
A finance coordinator needs colleagues to submit expense adjustments, but the underlying workbook contains formulas, reference tables, and prior records that nobody should casually overwrite. An open worksheet is convenient, yet it also invites accidental edits.
A VBA data entry form can give people a much safer path: they enter only the fields you intend, click Save, and VBA places the result in the correct location. Adding a password check can ensure that only approved users reach that form.
That sounds simple, but the details matter. A password prompt alone does not make an Excel file secure, and poorly designed VBA can expose data, leave sheets unprotected after an error, or save incomplete records.
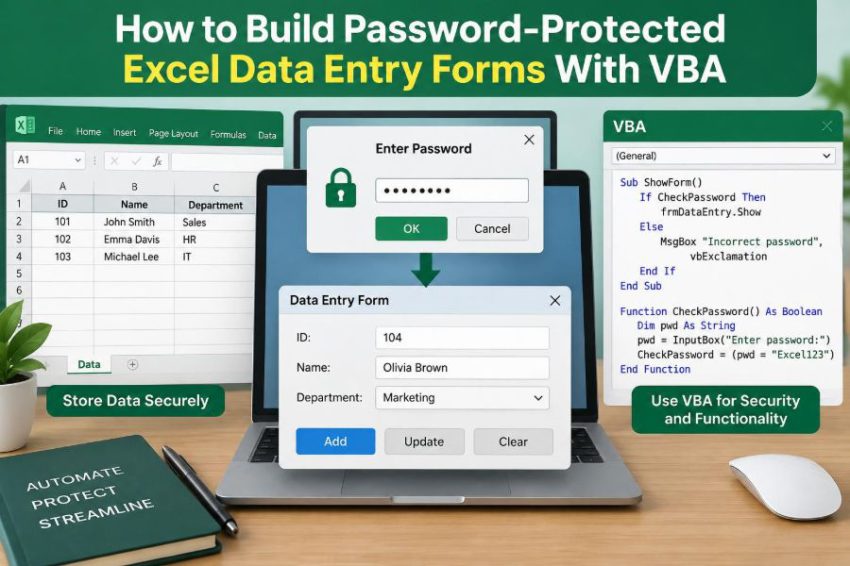
This tutorial builds a practical pattern: authenticate a user, show a UserForm, validate entries, write to a protected worksheet, and close the process cleanly. It is a useful solution for controlled internal workflows. 🔐
🧭 1. Define What “Password-Protected” Means
Before writing code, separate access control from data protection. A password gate in VBA controls whether someone can use your form; it does not automatically prevent a determined person from opening or examining the workbook.
Excel offers several different protection features, each with a distinct purpose. Choosing the right one prevents a false sense of security.
- Workbook file encryption: requires a password to open the file and is the appropriate choice for sensitive file contents.
- Worksheet protection: limits actions such as editing locked cells, deleting rows, or changing formulas.
- Workbook structure protection: limits actions such as adding, moving, hiding, or unhiding worksheets.
- VBA form authentication: controls the workflow presented to ordinary users.
🎯 2. Choose a Suitable Use Case
This approach works well when a small group uses a shared template or an internal process workbook. Typical examples include issue logs, stock requests, service reports, training attendance, and monthly adjustments.
It is less suitable when you need organization-wide identity management, detailed audit trails, concurrent multi-user data entry, or strong security against malicious users. In those cases, a database, SharePoint list, Power Apps solution, or an approved business system may be more appropriate.
🛡️ 3. Understand VBA’s Security Limitations
Do not store highly sensitive information in a workbook merely because a VBA password form exists. VBA code is visible to users who can access the project unless additional measures are applied, and VBA project protection should not be treated as strong security.
A hard-coded password is especially weak because it exists in the code. For a modest internal control, it may be acceptable; for confidential material, use file encryption and follow your organization’s security policies.
The form password is a workflow barrier, not a replacement for secure file storage and permissions.
🗂️ 4. Plan the Workbook Layout First
Start with a clean workbook design. This makes the form code shorter, easier to maintain, and less likely to break when records grow.
Create a worksheet named Data. In row 1, add headers such as Record ID, Entry Date, Employee Name, Department, Request Type, Amount, and Notes.
Use one row per submitted record. Avoid merged cells, blank header names, and manually maintained ranges that stop after a fixed number of rows.
📋 5. Turn the Data Range Into an Excel Table
Select the headers and a few empty rows, then create a table from the Insert tab. Rename it tblEntries from the Table Design tab.
Tables expand automatically when VBA adds records. They also let you refer to meaningful column names instead of fragile cell addresses such as Cells(nextRow, 6).
In this tutorial, the Data sheet contains a table with these columns:
- Record ID
- Entry Date
- Employee Name
- Department
- Request Type
- Amount
- Notes
🧰 6. Enable the Developer Tools
If the Developer tab is not visible, open Excel Options, choose Customize Ribbon, and enable Developer. This tab provides access to the Visual Basic Editor, macros, and form controls.
Save the workbook as an Excel Macro-Enabled Workbook with the .xlsm extension. A standard .xlsx file cannot retain VBA code.
🪟 7. Create the Login UserForm
Press Alt + F11 to open the Visual Basic Editor. Choose Insert, then UserForm. In the Properties window, rename the form frmLogin and set its Caption to Password Required.
Add the following controls and give them clear names. Meaningful names make code easier to read than default names such as TextBox1.
- A Label explaining that authorization is required
- A TextBox named
txtPassword - A CommandButton named
cmdLoginwith Caption set to Sign In - A CommandButton named
cmdCancelwith Caption set to Cancel
🙈 8. Mask Password Characters
Select txtPassword in the UserForm designer. Set its PasswordChar property to *. The user’s typed characters will display as asterisks rather than readable text.
This protects against casual shoulder surfing. It does not encrypt the value in memory or make the password itself secure, so it should be treated as a usability feature.
🔑 9. Store the Demonstration Password Carefully
For a training workbook, place the expected password in a standard module as a private constant. Insert a module and rename it, if desired, to modSecurity.
The example below deliberately uses a placeholder. Replace it with an internal value only after considering who can access the workbook and its code.
Option Explicit

Private Const FORM_PASSWORD As String = "ReplaceThisPassword"

Public Function IsValidPassword(ByVal enteredPassword As String) As Boolean
    IsValidPassword = (enteredPassword = FORM_PASSWORD)
End Function
A private constant reduces accidental use elsewhere in the project, but it does not turn the value into a secret. Never describe this technique as encryption.
🚪 10. Code the Sign-In Button
Double-click the Sign In button on frmLogin and add the following procedure. It checks the entered text, opens the data entry form when the password matches, and clears the password field when it does not.
Private Sub cmdLogin_Click()
    If IsValidPassword(Me.txtPassword.Value) Then
        Me.txtPassword.Value = vbNullString
        Me.Hide
        frmEntry.Show
    Else
        MsgBox "The password is not correct.", vbExclamation, "Access denied"
        Me.txtPassword.Value = vbNullString
        Me.txtPassword.SetFocus
    End If
End Sub
Me.Hide keeps the login form loaded while the entry form is displayed. Clearing the field before hiding prevents the previous typed value from remaining in the control.
❎ 11. Give Users a Safe Way to Cancel
A cancel button should close the login form without opening anything else. Add this procedure to frmLogin.
Private Sub cmdCancel_Click()
    Me.txtPassword.Value = vbNullString
    Unload Me
End Sub
Cancellation is part of good interface design. Users should not have to force-close Excel simply because they opened a login form by mistake.
🧾 12. Build the Data Entry Form
Insert a second UserForm, rename it frmEntry, and set its Caption to New Data Entry. Add labels and controls corresponding to your table columns.
For this example, use a TextBox for dates, names, amounts, and notes; ComboBoxes for Department and Request Type; and buttons named cmdSave and cmdClose.
Suggested control names include txtEntryDate, txtEmployeeName, cboDepartment, cboRequestType, txtAmount, and txtNotes.
📦 13. Populate Controlled Drop-Down Lists
ComboBoxes reduce spelling variations and make later analysis more reliable. If every user types a department name freely, values such as “HR”, “Human Resources”, and “human resources” can become separate categories.
Add this initialization code to frmEntry. Adapt the listed values to your own process.
Private Sub UserForm_Initialize()
    Me.txtEntryDate.Value = Format(Date, "dd-mmm-yyyy")

    Me.cboDepartment.Clear
    Me.cboDepartment.List = Array("Finance", "Operations", "Sales", "Human Resources")

    Me.cboRequestType.Clear
    Me.cboRequestType.List = Array("Adjustment", "Request", "Correction")
End Sub
For a larger solution, load these lists from a controlled worksheet rather than embedding them in code. That lets an authorized workbook owner update options without editing VBA.
✅ 14. Validate Required Fields Before Saving
Validation is the form’s most valuable job. It stops incomplete or obviously invalid records before they reach the worksheet.
Create a function inside frmEntry that checks the fields your process requires.
Private Function FormIsValid() As Boolean
    If Not IsDate(Me.txtEntryDate.Value) Then
        MsgBox "Enter a valid date.", vbExclamation
        Me.txtEntryDate.SetFocus
        Exit Function
    End If

    If Trim(Me.txtEmployeeName.Value) = vbNullString Then
        MsgBox "Enter an employee name.", vbExclamation
        Me.txtEmployeeName.SetFocus
        Exit Function
    End If

    If Me.cboDepartment.Value = vbNullString Then
        MsgBox "Select a department.", vbExclamation
        Me.cboDepartment.SetFocus
        Exit Function
    End If

    FormIsValid = True
End Function
Keep validation messages specific. “Enter a valid date” tells the user what to fix; “Invalid input” does not.
💰 15. Validate Numeric Amounts Separately
Numbers deserve an additional check because text boxes accept almost any characters. Use IsNumeric before converting an amount with CDbl.
Private Function AmountIsValid() As Boolean
    If Not IsNumeric(Me.txtAmount.Value) Then
        MsgBox "Enter a numeric amount.", vbExclamation
        Me.txtAmount.SetFocus
        Exit Function
    End If

    If CDbl(Me.txtAmount.Value) < 0 Then
        MsgBox "The amount cannot be negative.", vbExclamation
        Me.txtAmount.SetFocus
        Exit Function
    End If

    AmountIsValid = True
End Function
Your own business rule may allow negative values, zero, or a maximum amount. Put that rule explicitly in code rather than assuming every numerical field follows the same logic.
🆔 16. Create a Simple Record Identifier
A record ID helps users and administrators discuss a specific submission. For an internal log, a time-based ID can be adequate, although it is not guaranteed to be unique if multiple users create entries at the same instant.
Add this function to a standard module:
Public Function NewRecordID() As String
    NewRecordID = "REC-" & Format(Now, "yyyymmdd-hhnnss")
End Function
For multi-user or high-volume systems, use an identifier generated by a database or another central system. Do not rely on a worksheet row number if records might be sorted or deleted.
🧱 17. Write Records Through the Table Object
Using a ListObject makes row insertion predictable. The next code adds a new table row and fills each named column, so it does not depend on the table beginning in a particular worksheet column.
Private Sub cmdSave_Click()
    Dim ws As Worksheet
    Dim tbl As ListObject
    Dim newRow As ListRow

    If Not FormIsValid Then Exit Sub
    If Not AmountIsValid Then Exit Sub

    Set ws = ThisWorkbook.Worksheets("Data")
    Set tbl = ws.ListObjects("tblEntries")

    Set newRow = tbl.ListRows.Add

    With newRow.Range
        .Cells(1, tbl.ListColumns("Record ID").Index).Value = NewRecordID()
        .Cells(1, tbl.ListColumns("Entry Date").Index).Value = CDate(Me.txtEntryDate.Value)
        .Cells(1, tbl.ListColumns("Employee Name").Index).Value = Trim(Me.txtEmployeeName.Value)
        .Cells(1, tbl.ListColumns("Department").Index).Value = Me.cboDepartment.Value
        .Cells(1, tbl.ListColumns("Request Type").Index).Value = Me.cboRequestType.Value
        .Cells(1, tbl.ListColumns("Amount").Index).Value = CDbl(Me.txtAmount.Value)
        .Cells(1, tbl.ListColumns("Notes").Index).Value = Trim(Me.txtNotes.Value)
    End With

    MsgBox "Your entry has been saved.", vbInformation
    ClearEntryForm
End Sub
This code assumes the column headings match exactly. If you rename a table heading, update the matching VBA string as well.
🔒 18. Protect the Data Worksheet
Worksheet protection helps prevent users from casually changing the saved records, formulas, and layout. It should be applied after your table and formatting are ready.
The following procedure protects the Data sheet while allowing VBA operations to work during the current Excel session.
Public Sub ProtectDataSheet()
    With ThisWorkbook.Worksheets("Data")
        .Protect Password:="ReplaceThisSheetPassword", _
                 UserInterfaceOnly:=True, _
                 AllowFiltering:=True
    End With
End Sub
Important: the UserInterfaceOnly setting is not retained after the workbook closes. You must apply it again whenever the workbook opens.
🔄 19. Reapply Sheet Protection at Workbook Open
In the Visual Basic Editor, double-click ThisWorkbook and add the event procedure below. It runs when the workbook is opened and reapplies the user-interface-only protection setting.
Private Sub Workbook_Open()
    ProtectDataSheet
End Sub
If macros are disabled, this event cannot run. Design the workbook so that users understand macros must be enabled for the form workflow, but do not encourage users to enable macros in files they do not trust.
🧹 20. Clear the Form After a Successful Save
After saving, clear only the controls that should not carry forward. Usually the current date is useful as a default, while a person’s name or a monetary amount should be cleared.
Private Sub ClearEntryForm()
    Me.txtEntryDate.Value = Format(Date, "dd-mmm-yyyy")
    Me.txtEmployeeName.Value = vbNullString
    Me.cboDepartment.Value = vbNullString
    Me.cboRequestType.Value = vbNullString
    Me.txtAmount.Value = vbNullString
    Me.txtNotes.Value = vbNullString
    Me.txtEmployeeName.SetFocus
End Sub
Place this procedure in frmEntry. Clearing a form only after a confirmed save avoids losing information when validation fails.
🚶 21. Close the Entry Form Cleanly
Add a Close button so users can leave the form without adding another record. This is preferable to relying on the window close button alone, especially in a structured business template.
Private Sub cmdClose_Click()
    Unload Me
    Unload frmLogin
End Sub
Unloading both forms resets their controls. The next time the user opens the form, initialization runs again and the old login state is not reused.
▶️ 22. Create One Public Starting Macro
Users should have one obvious entry point. In a standard module, add a macro that displays the login form.
Public Sub StartDataEntry()
    frmLogin.Show
End Sub
Assign this macro to a button on a simple Home sheet. A clear label such as “Open Data Entry Form” is better than asking users to open the Macro dialog.
🏠 23. Design a Friendly Home Sheet
A Home sheet can explain the workbook’s purpose, give brief instructions, and contain the macro button. Keep it uncluttered so the intended workflow is obvious.
Consider including these items:
- A short explanation of what the form records
- A reminder to enable macros only if the workbook comes from a trusted source
- An “Open Data Entry Form” button
- Contact details or an internal process owner, where appropriate
Hide technical sheets only for convenience, not as a security measure. A hidden worksheet can be revealed by users with sufficient access and knowledge.
🧪 24. Test Normal and Error Paths
Testing should include more than one successful submission. Try each field empty, type letters into the amount field, enter an invalid date, cancel at login, and enter an incorrect password.
Also confirm that a valid save creates exactly one row and places each value under the correct header. Test after closing and reopening the workbook to confirm that protection is reapplied.
Useful test checklist
- Correct password opens the entry form.
- Incorrect password does not open the entry form.
- Cancel returns the user to Excel without an error.
- Required fields block saving when blank.
- Each valid submission creates one complete table row.
- Sheet protection does not block the intended VBA save operation.
⚠️ 25. Handle Errors Without Leaving a Weak State
A production workbook should anticipate unexpected errors, such as a renamed worksheet or a missing table. At minimum, show a useful message instead of allowing VBA to stop with a confusing error dialog.
Add an error handler to the save procedure before its main code:
Private Sub cmdSave_Click()
    On Error GoTo SaveError
    'Validation and save code goes here.
    Exit Sub

SaveError:
    MsgBox "The record could not be saved: " & Err.Description, _
           vbExclamation, "Save error"
End Sub
If your code explicitly unprotects sheets, use a cleanup path that attempts to restore protection even after an error. Better still, use UserInterfaceOnly when it fits the task and avoid repeatedly unprotecting a sheet.
👥 26. Consider Better Authentication Options
A single shared password provides limited accountability because everyone uses the same credential. If you need to know who submitted each record, capture a user identifier and consider how reliably it can be verified.
Windows usernames obtained through VBA can be convenient, but they are not a complete authentication system by themselves. For higher assurance, use an approved platform that integrates with your organization’s account management.
| Approach | Best for | Main limitation |
|---|---|---|
| Hard-coded VBA password | Simple internal workflow gate | Password is stored in the workbook project |
| Protected worksheet | Preventing routine edits | Not a substitute for file encryption |
| Password to open | Protecting workbook file contents | Does not provide individual user identity |
| Central business application | Stronger access control and auditing | Requires a different platform and setup |
📦 27. Distribute and Maintain the Workbook Responsibly
Keep a protected master copy and distribute controlled copies according to your team’s process. Document the sheet names, table name, column headings, and authorized maintenance steps so a future editor does not accidentally break the form.
When requirements change, update the table structure, UserForm controls, validation rules, and save code together. A data entry form is an interface to a data model; changing only one side causes errors.
🌟 28. Build Around the Core Principle
The strongest Excel form is not the one with the most code. It is the one that guides users into a narrow, understandable workflow, checks the data before saving, protects routine worksheet operations, and states its security limits honestly.
Use VBA password checks to improve internal process control, use worksheet protection to reduce accidental changes, and use proper file encryption and organizational access controls when confidentiality matters.
A password-protected VBA form should make correct data entry easier while never pretending to provide more security than Excel can deliver. 🔒✅📊