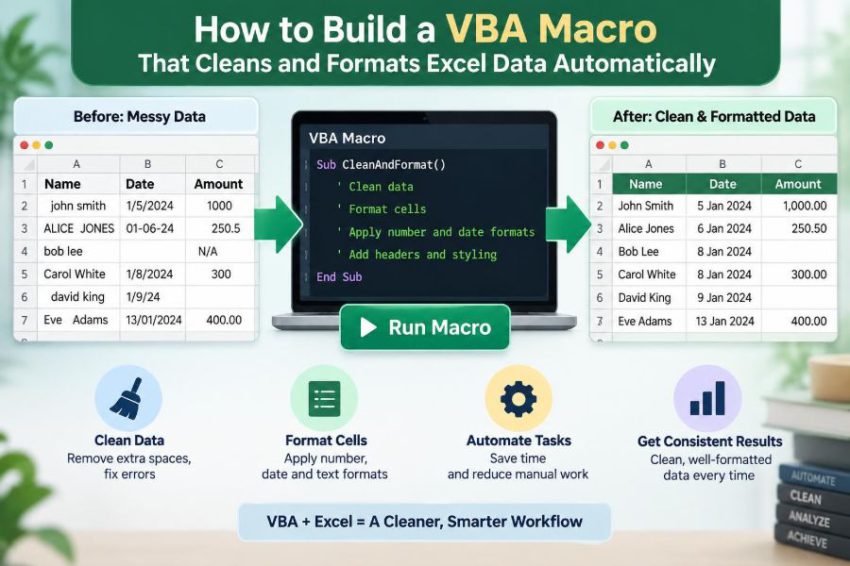

You receive a spreadsheet from a colleague, a customer, or another system. The information is useful, but the worksheet is not ready to analyze: names contain extra spaces, dates are inconsistent, blank rows break up the list, and headings are difficult to read.
Cleaning that sheet by hand may be manageable once. Doing the same sequence every week is slower, harder to audit, and surprisingly easy to do differently from one file to the next.
A VBA macro can turn a repeatable cleanup routine into a button-driven process. It can identify the data range, standardize selected values, remove avoidable clutter, and apply readable formatting in seconds.
The goal is not to make one giant macro that changes everything blindly. The goal is to build a careful routine that preserves the data you need, makes its rules visible, and can be adjusted when the workbook changes.
🧭 Start with the real cleanup problem
Before writing code, describe the manual process in plain language. For example: remove blank rows, trim spaces from text, format the header row, set date and currency formats, add filters, and autofit columns.
This list becomes your macro’s specification. It also exposes decisions that code cannot safely make on its own, such as whether a blank row means “delete this record” or “start a new section.”
🎯 Define what “clean” means for your worksheet
Clean data is not merely data with attractive colors. It is data arranged consistently enough for people, formulas, PivotTables, charts, and imports to interpret it correctly.
For a sales register, consistency might mean one row per sale, real Excel dates in the Order Date column, numeric amounts in Total, and no leading or trailing spaces in customer names. Your definition should reflect the sheet’s purpose.
🗂️ Protect the original data first
Use a copy of the source workbook while developing and testing. A macro can make many changes quickly, including unwanted ones, and Undo is not reliably available after a VBA macro runs.
A practical approach is to keep the imported sheet untouched and create a cleaned output sheet. If you must edit the source sheet, save a dated backup before running the macro.
🧱 Choose a predictable worksheet layout
Automation works best when the structure is stable. Put field names in one header row, keep each record on one row, and avoid merged cells inside the data area.
Rows used as titles, notes, subtotals, or decorative separators make it harder to identify the actual table. If those elements are required for presentation, keep them outside the raw data range when possible.
🔒 Save the workbook as a macro-enabled file
Excel stores VBA code in macro-enabled formats such as .xlsm. If you save a workbook containing code as a standard .xlsx file, Excel removes the VBA project.
Use a meaningful filename, then close and reopen it once during setup. This simple check confirms that the workbook retains the macro.
🛠️ Open the Visual Basic Editor
Press Alt + F11 to open the Visual Basic Editor, often called the VBE. In the Project Explorer, find your workbook, choose Insert > Module, and place the macro there.
A standard module is a sensible home for a general cleanup routine. It keeps the procedure separate from worksheet event code, which runs automatically when users change cells.
📌 Use explicit object references
VBA can act on whichever workbook or worksheet happens to be active. That is convenient while recording a macro but risky in a reusable solution.
Instead, store the workbook and worksheet in variables. This makes it clear where the macro will work and reduces the chance of formatting the wrong open file.
Option Explicit

Sub CleanAndFormatData()
    Dim ws As Worksheet
    Set ws = ThisWorkbook.Worksheets("Raw Data")
End Sub
Option Explicit requires variables to be declared. It helps catch spelling mistakes, such as typing lastRw in one line and lastRow in another.
🧩 Plan the macro as a sequence of stages
A cleanup macro is easier to understand when each stage has one job. A useful order is: validate the sheet, find the used range, clean values, remove unwanted rows, format the table, then restore Excel settings.
Order matters. For instance, trimming text before checking whether rows are empty can reveal rows that contain only spaces.
🔍 Find the last row without relying on selection
Many recordings use Selection or ActiveCell. Those references depend on user actions, so they make code fragile.
If column A is a reliably populated identifier, find the final record like this:
Dim lastRow As Long
lastRow = ws.Cells(ws.Rows.Count, "A").End(xlUp).Row
This starts at the bottom of column A and moves upward to the first nonblank cell. It is fast and dependable only when the chosen column is expected to contain data for every valid record.
📐 Identify the final data column carefully
To format all populated fields, you also need the last column. When headers are on row 1, use the final nonblank header cell:
Dim lastCol As Long
lastCol = ws.Cells(1, ws.Columns.Count).End(xlToLeft).Column
This assumes the header row has no intended blank gaps at the end. If your data begins somewhere other than row 1, replace the row number with the correct header row.
🧪 Validate assumptions before changing cells
Validation is the macro’s safety check. At minimum, confirm that the expected worksheet exists and that the data range contains more than a header.
You can also verify required column names. A macro that expects Order Date should stop with a useful message if someone renames it to Date Ordered, rather than applying a date format to the wrong column.
🧹 Remove accidental spaces from text
Extra spaces cause subtle problems. “North” and “North ” look identical but can appear as separate categories in a PivotTable or fail an exact lookup.
Trim$ removes spaces at the beginning and end of a string. To collapse repeated internal spaces as well, use the worksheet Trim function. Work cell by cell only in columns that are intended to contain text.
Dim cell As Range
For Each cell In ws.Range("B2:B" & lastRow)
    If Not IsError(cell.Value) Then
        cell.Value = Application.WorksheetFunction.Trim(CStr(cell.Value))
    End If
Next cell
Do not trim codes where spaces carry meaning, such as fixed-width identifiers. Cleaning rules should follow the business meaning of a field, not just its appearance.
🔤 Standardize text without destroying meaning
Functions such as UCase$, LCase$, and StrConv can make categories more uniform. For example, converting a State column to uppercase may be appropriate when the data uses abbreviations.
Names are more complicated. “McDonald,” “O’Neill,” and organization names do not always follow simple title-case rules. Use automatic capitalization only where the source convention is known and the consequence of a mistake is acceptable.
📅 Convert and format dates separately
A date that looks like 03/04/2025 can be ambiguous. It may mean March 4 or April 3 depending on the source convention. Formatting cannot fix a date that Excel interpreted incorrectly.
First make sure the values are genuine Excel date serials and that the source’s day-month order is understood. Then apply a display format such as:
ws.Range("C2:C" & lastRow).NumberFormat = "dd-mmm-yyyy"The format changes display, not the underlying date value. This distinction is useful because formulas can still sort and calculate with real dates.
💰 Keep numbers numeric and format their display
A value imported as text cannot always be summed correctly, even if it looks like a number. Apostrophes, spaces, currency symbols, and inconsistent decimal separators may all prevent numerical calculation.
Once values are confirmed as numeric, apply a number format rather than adding symbols into the cell value itself.
ws.Range("F2:F" & lastRow).NumberFormat = "$#,##0.00"
ws.Range("G2:G" & lastRow).NumberFormat = "0.0%"
Choose formats that suit your locale and organization. The key principle is to preserve numbers as numbers.
🗑️ Delete blank rows only with a clear rule
Deleting blank rows sounds simple until formulas, notes, or partially completed records enter the picture. Deleting every row with one empty cell would remove valid data.
A cautious rule is to delete rows only when the entire expected data range is blank. Work from bottom to top, because deleting a row shifts every row below it upward.
Dim r As Long
For r = lastRow To 2 Step -1
    If Application.WorksheetFunction.CountA(ws.Range(ws.Cells(r, 1), _
        ws.Cells(r, lastCol))) = 0 Then
        ws.Rows(r).Delete
    End If
Next r
Recalculate lastRow after deletion if later steps depend on it.
🚫 Handle duplicates as a business decision
Excel can remove duplicates, but a repeated value is not automatically an erroneous record. Two orders from the same customer on the same day may both be legitimate.
Define a unique key first: perhaps Invoice Number, or a combination of Order ID and Line Number. Keep duplicate removal as a separate, clearly labeled step so users know it is happening.
🧾 Make the header row immediately recognizable
Headers should visually separate labels from records without overpowering the sheet. Bold text, a restrained fill color, and wrapped text are usually enough.
With ws.Range(ws.Cells(1, 1), ws.Cells(1, lastCol))
    .Font.Bold = True
    .Interior.Color = RGB(217, 225, 242)
    .WrapText = True
End With
A consistent header makes the worksheet easier to scan and signals where filtering and sorting should begin.
↔️ Size columns for readability, not maximum width
AutoFit is an excellent starting point, but it can create an unreasonably wide column when one cell contains a long comment or URL.
Autofit first, then cap known problem columns or enable wrapping. For example, a Notes column might have a fixed width and wrapped text, while short code columns remain narrow.
ws.Columns("A:" & Split(ws.Cells(1, lastCol).Address, "$")(1)).AutoFit
ws.Columns("H").ColumnWidth = 35
ws.Columns("H").WrapText = True
🎨 Use formatting to communicate structure
Formatting should help users distinguish labels, inputs, dates, money, and exceptions. It should not turn a working dataset into a patchwork of colors.
Use one small visual system consistently. For example, use a single header style, right-align numeric fields, and reserve a light highlight for cells requiring review. Consistency lowers the effort needed to read the sheet.
🔽 Add filters and freeze the header
Filters let readers narrow a table without manually hiding rows. If the data range has a single header row, add an AutoFilter across the full range.
ws.Range(ws.Cells(1, 1), ws.Cells(lastRow, lastCol)).AutoFilterFreezing the top row can also help with long lists. This is a display preference rather than a data-cleaning step, so apply it only if it suits the workbook’s users.
📋 Convert the range to an Excel Table when appropriate
An Excel Table is a structured range with headers, filters, and automatic expansion. It can make formulas and summaries easier to maintain as new rows are added.
However, do not convert a range blindly if another process expects a plain worksheet range or if the sheet contains multiple separate blocks. Tables are useful when the data is genuinely one continuous list.
⚡ Speed up the macro responsibly
Screen refreshing, automatic calculation, and event handling can slow a macro that changes many cells. Temporarily disabling them can improve responsiveness.
Always restore settings even if an error occurs. Otherwise, Excel may appear stuck because calculation or screen updating remains off.
Application.ScreenUpdating = False
Application.EnableEvents = False
Application.Calculation = xlCalculationManual

'Cleanup code goes here

Application.Calculation = xlCalculationAutomatic
Application.EnableEvents = True
Application.ScreenUpdating = True
For a production macro, an error-handling block is the safer way to guarantee restoration.
🛡️ Add simple error handling
Error handling does not mean hiding problems. It means stopping safely, explaining what failed, and restoring Excel to a usable state.
On Error GoTo CleanFail

'Cleanup steps

CleanExit:
    Application.ScreenUpdating = True
    Application.EnableEvents = True
    Exit Sub

CleanFail:
    MsgBox "The cleanup stopped: " & Err.Description
    Resume CleanExit
As the macro grows, report errors in language a user can act on. “Worksheet ‘Raw Data’ was not found” is more helpful than a generic runtime error number.
🧠 Avoid the recorded-macro trap
The Macro Recorder is useful for discovering object names and basic syntax. It often produces code full of selections, fixed addresses, and formatting settings that are unrelated to your actual goal.
Treat recorded code as a draft, not a finished solution. Replace Select and Activate with direct references, remove redundant lines, and introduce variables for changing row and column limits.
🧯 Watch for formulas, errors, and hidden content
A cleanup macro should not casually overwrite formulas with values. Before changing a column, decide whether it is an imported input field or a calculated field that must remain a formula.
Likewise, cells containing errors such as #N/A may be useful warnings from a lookup. Do not replace them with blanks unless you understand why they occur. Hidden rows and columns may also contain supporting data that should not be reformatted or deleted.
🧭 Make column references resilient
Hard-coding “column F is Amount” works only while the layout never changes. A more resilient macro searches the header row for the required label, then uses the matching column number.
This takes more code, but it is worthwhile for shared templates or reports whose columns may be reordered. It also lets the macro stop early when a required field is absent.
🧱 A compact macro skeleton
The following example shows the overall pattern. It assumes headers are in row 1, column A contains an identifier, and the sheet name is Raw Data. Adjust those assumptions before using it.
Option Explicit

Sub CleanAndFormatData()
    Dim ws As Worksheet
    Dim lastRow As Long, lastCol As Long, r As Long
    Dim cell As Range

    On Error GoTo CleanFail
    Set ws = ThisWorkbook.Worksheets("Raw Data")

    Application.ScreenUpdating = False
    Application.EnableEvents = False

    lastRow = ws.Cells(ws.Rows.Count, "A").End(xlUp).Row
    lastCol = ws.Cells(1, ws.Columns.Count).End(xlToLeft).Column
    If lastRow < 2 Then GoTo CleanExit

    For Each cell In ws.Range("B2:B" & lastRow)
        If Not IsError(cell.Value) Then cell.Value = _
            Application.WorksheetFunction.Trim(CStr(cell.Value))
    Next cell

    For r = lastRow To 2 Step -1
        If Application.WorksheetFunction.CountA(ws.Range(ws.Cells(r, 1), _
            ws.Cells(r, lastCol))) = 0 Then ws.Rows(r).Delete
    Next r

    lastRow = ws.Cells(ws.Rows.Count, "A").End(xlUp).Row
    With ws.Range(ws.Cells(1, 1), ws.Cells(1, lastCol))
        .Font.Bold = True
        .Interior.Color = RGB(217, 225, 242)
    End With
    ws.Range(ws.Cells(1, 1), ws.Cells(lastRow, lastCol)).AutoFilter
    ws.Columns.AutoFit

CleanExit:
    Application.EnableEvents = True
    Application.ScreenUpdating = True
    Exit Sub

CleanFail:
    MsgBox "Cleanup stopped: " & Err.Description
    Resume CleanExit
End Sub
🧪 Test with realistic messy samples
Test the macro on copies containing the kinds of problems you actually receive: extra spaces, blank lines, missing values, a long note, an unexpected header, and a row with a formula.
Then inspect both what changed and what did not change. Good testing includes edge cases, because a macro that works only on a perfectly tidy sample is not ready for recurring real-world files.
✅ Build a review step into the workflow
Automation reduces repetitive work, but it does not replace judgment. After the macro runs, review record counts, key totals, filters, and a few representative rows.
If the macro deletes rows or changes types, consider recording how many rows it removed and displaying a short completion message. A visible summary helps users notice unexpected results.
📚 Document the rules beside the code
Add short comments explaining assumptions: which worksheet is used, which column is the identifier, which fields are safe to trim, and what condition defines a blank row.
Documentation matters most when the workbook is handed to someone else—or reopened by you months later. Clear rules make future edits safer than clever but unexplained code.
🚀 Run the macro in a user-friendly way
During development, run the procedure with F5 in the VBE or through Excel’s Macro dialog. For regular users, assign the macro to a clearly labeled button on a worksheet or the Quick Access Toolbar.
A label such as “Clean Imported Data” is better than “Run Macro.” It tells users what will happen and encourages them to use the intended routine rather than editing the code.
🏁 Treat automation as a repeatable data contract
The strongest cleanup macro is not the one with the most lines of code. It is the one whose assumptions are clear: what a valid row looks like, which fields can be standardized, what must be preserved, and how success is checked.
When source files change, update those rules deliberately. A macro is a repeatable agreement between an incoming dataset and the organized worksheet your team needs.
A reliable VBA cleanup macro combines careful data rules, explicit references, cautious changes, and a final human review. Build it in small stages, test it against real files, and let Excel handle the repetitive work while you keep control of the decisions. ⚙️📊✅